Tel./WhatsApp:
+86 15266206885
E-mail:
[email protected]


Avoid your inquiry is delay response, please enter your WhatsApp/Skype along with the message, so we can contact you at the very first time.
We will reply you within 24 hours. If for urgent case, please add WhatsApp/WeChat: ,. Or call directly.
Labels look simple—until the sensor misses one and your whole line stops. Wrong position, dirty light path, or the wrong gap setting can cause false triggers, bad print placement, and wasted label material. The good news: a clean, step-by-step adjust routine fixes most problems fast.
If you’re asking “How do I adjust a label sensor correctly?”: start by identifying the sensor type (optical or ultrasonic), then run a two-point teach (backing-only, then label+backing), confirm the label and gap signal, and fine-tune sensitivity so the sensor to detect the media is stable at normal running speed. For many setups, this solves the issue in minutes.
Label Sensor Adjustment Guide
How do you set a label sensor on a labeling machine? (Set + machine + device)
What is a label sensor, and how does it detect label and gap on media? (Tech + machinery)
Step-by-step sensor adjustment: backing teach, label teach, and calibration mode (Set + tech)
Where should the sensor position be for different label material types? (Position + material)
Why does the indicator light blink or show false triggers? (Light + troubleshooting)
Optical vs ultrasonic label sensors: which one fits clear labels and laminate? (Device + tech)
How to adjust sensitivity and pressure-related feed issues that mimic sensor problems (Pressure + machine)
A quick check table: symptoms, cause, and the correct adjustment (Enhance + support)
Case study: how we reduced changeover time and improved output in an e-commerce line (Enhance + machinery)
When to contact the manufacturer for technical support and a sensor calibration plan (Support + technical)
When I help B2B teams in manufacturing and logistics, I always start with the same approach: set the basics before touching advanced settings. A sensor can only “see” the label correctly if the media path is stable.
Here’s the simple setup flow I recommend on any machine or device:
Power on and load media straight (no skew).
Confirm the label backing tracks centrally through the area where the sensor reads.
Place the sensor at a clear point where the web is flat, not bouncing.
Ensure the distance between sensor heads (if applicable) matches the material thickness.
If you do this first, your later adjust steps become easy—and repeatable across multiple lines.
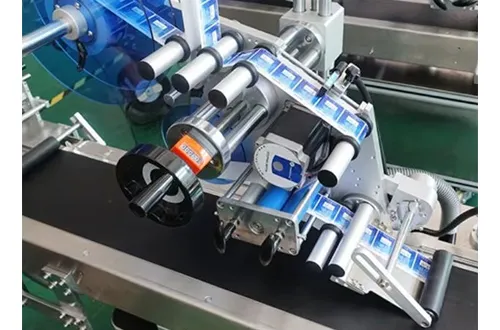
A label sensor is the “eyes” of your labeling station. Its job is to trigger the label feed at the right moment so the correct label lands in the correct position.
Most systems detect one of these differences:
Label vs gap: the sensor looks for the gap between labels on the backing.
Mark detection: the sensor reads a printed mark on the media.
Thickness change: especially common for ultrasonic types.
A reliable sensor to detect the web depends on:
Label material (paper, film, clear, foil)
Adhesive and laminate layers
Web speed and running tension
Clean surface and stable path
For general background on sensor technologies (including ultrasonic behavior through the gap), Lion Precision’s overview is a helpful reference: Label Sensor Types & Technologies.
This is the fastest method I’ve seen work across real plants—because it teaches the sensor the two key states of the media.
The “two-point teach” method (most common)
Insert backing only (no label) into the sensor window.
Enter teach mode (each machine is different—check your manual).
Teach “backing” as point one.
Move the web so backing + label is in the sensor window.
Teach “label” as point two.
Test feed: the indicator should change clearly at each gap.
This exact idea is described in a practical walkthrough from Inline Pack, including using a calibration mode and then fine-tuning with keys. It’s a solid reference if your operator needs a plain-language instruction: Label Gap Sensor Adjustment Made Simple.
One-time sensor calibration
After the teach, I do a single pass of sensor calibration at normal line speed. If the web behaves differently under speed, you’ll catch it here. Treat it like a “real-world validation,” not a lab test.
You only need sensor adjustment once per major change—like new label material, new media supplier, or a big speed change.
The best position is where the media is stable, flat, and consistent. I like to place the sensor near a support roller—not in a floating span.
Here’s a practical guide by label material:
Paper label: optical works well; place sensor over the web center.
Clear film label: optical can struggle; consider ultrasonic label sensing or special clear-label optics.
Foil / reflective surfaces: optical may bounce; re-check the light alignment and the web surface.
Thick laminate: thickness variation can confuse; confirm the sensor head distance.
A common mistake: teams set the sensor too close to a peel plate where vibration is high. The result is a “random” false trigger that looks like a software issue—but it’s really a motion issue.

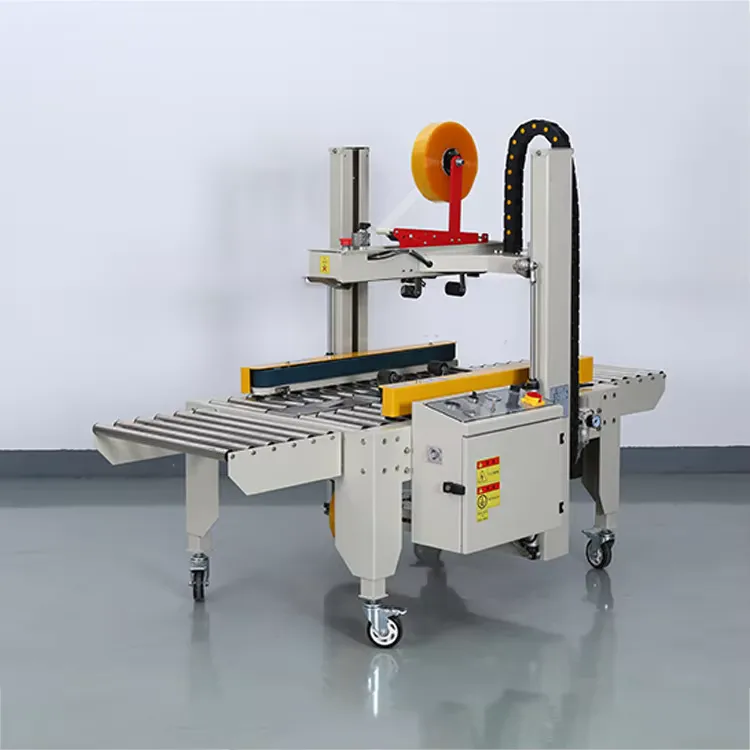
Auto Labeler Machines
When the indicator behaves strangely, I run a quick checklist. This is classic troubleshooting, and it saves time.
Most common causes:
Dirty sensor window (dust, adhesive mist)
Wrong gap value taught (label too close, irregular spacing)
Web not tracking straight (side wander changes the reading area)
Power noise or loose connectors causing intermittent signal
The material is too shiny or too transparent for that sensor type
Here’s my “30-second” clean-and-test routine:
Wipe sensor faces with lint-free cloth (no harsh chemicals).
Re-run the two-point teach.
Watch the indicator light while you manually pull the media (slowly).
Confirm it switches once per gap, not multiple times.
If the light flips rapidly at one spot, that spot is the point to inspect (wrinkle, splice tape, debris).
This decision matters for B2B lines where label variety is high (e-commerce, 3PL, multi-SKU distribution). I keep it simple:
Optical (common, affordable)
Uses light changes to detect the label edge or gap
Great for most paper labels
May struggle with clear film or reflective surface
Ultrasonic (great for tricky media)
Uses sound waves to measure thickness difference through the web
Often best for ultrasonic label detection on clear materials
Less sensitive to metallic inks and visual reflections
Lion Precision explains ultrasonic behavior plainly: more sound energy passes at the gap than during the label for many stocks, which is why it can outperform optical on clear labels. Source
If your plant runs multiple label formats, ultrasonic can enhance uptime—especially when you switch label material often.
Here’s something I see all the time: the sensor is blamed, but the real cause is mechanical feed behavior.
If the drive roller pressure is too low:
The web slips → the sensor “sees” the gap late
If the roller pressure is too high:
The web stretches → the gap changes → inconsistent triggering
So I do this in order:
Set correct web tension (steady pull, no jerks).
Confirm roller pressure per the manual.
Then adjust the sensor sensitivity—only after the mechanics behave.
When you tweak sensitivity, do it gently:
Make one fine change
Run 10–20 labels
Check output: placement accuracy and skip rate
Don’t chase perfection at slow speed only. Always validate at real running speed.
Below is the table I wish every line lead had. It helps teams enhance uptime and reduces wasted label rolls.
| Symptom | Likely cause | What to do (fast) | Ensure |
| Missing labels | Sensor not detecting gap | Re-teach backing, then label | Correctly detects once per gap |
| Double-feeding | False triggers | Clean sensor, re-check position | Stable indicator response |
| Label placement drifting | Web slip / roller pressure | Set tension, then re-teach | Consistent output |
| Works slow, fails fast | Vibration or poor web path | Move sensor to stable area | Flat surface at sensor |
| Clear label not detected | Optical limits | Switch to ultrasonic or clear-label optics | Detects regardless of transparency |
If your operators need help, this is where good support matters. As a manufacturer, we build our packaging equipment around quick-change setup so you spend less time “tuning” and more time producing.
Internal link: For uptime-focused operations, see: preventive maintenance checklist for packaging machines.
A mid-size e-commerce warehouse came to us with a problem: frequent label stops during SKU changes. Their label sensor was inconsistent across different media rolls. The result was wasted labor and missed shipping cutoffs.
What we changed
Standardized the sensor position using a repeatable mechanical reference (a fixed mount and marked center line).
Implemented a quick two-point teach as a standard guide for every roll change.
Switched their clear-label station to an ultrasonic solution for stability.
The result
Faster changeovers and fewer sensor-related stoppages.
More predictable label placement on cartons and poly mailers.
This matches the broader trend: packaging automation keeps growing because companies need efficiency and stable operations. Market analysts project strong growth in packaging automation through the next decade. For example, Fortune Business Insights forecasts the packaging automation market expanding from 2026 onward. Packaging Automation Market
“The best automation wins aren’t flashy. They’re boring and reliable—steady sensors, clean media paths, repeatable setup.”
If you’ve done the basics and the problem stays, it’s time to get technical support involved. I say this as a packaging machinery builder: some issues are not operator mistakes—they’re system-level.
Contact us (or your OEM) when:
The sensor signal changes with power cycles (possible wiring/ground issue)
The sensor never stabilizes even after teach (wrong sensor type for material)
You have multiple lines and need a standardized design for fast changeovers
You’re integrating print + apply and need synchronization
Sometimes buyers ask about connectors and supply chains too. If your application uses specific interconnect ecosystems, companies like amphenol cit provide broad connectivity and sensor-related product categories across industries. Amphenol CIT overview
How often should I adjust the label sensor?
Adjust when you change label material, change media supplier, or see drift in triggers. If your line is stable, you should not need to adjust daily—just clean and verify the indicator.
What’s the fastest way to fix a sensor that misses the gap?
Do a two-point teach: backing-only first, then label+backing. This simple adjustment method resolves most problems quickly. Reference walkthrough
Why does a clear label fail on an optical sensor?
Clear film often doesn’t create enough light contrast. In many cases, ultrasonic sensors work better because they sense thickness changes using sound waves rather than light. Sensor technology overview
Can pressure settings really affect sensor readings?
Yes. Roller pressure and tension can stretch or slip the web, changing the apparent gap timing. Fix mechanical feed behavior first, then do the sensor teach.
What should I check before contacting technical support?
Confirm clean sensor faces, stable web path, correct position, correct teach, and test at real running speed. If it still fails, contact technical teams with your machine model, speed, and material details.
A label sensor must be taught on backing and on label to detect the gap reliably.
Fix mechanical issues (pressure, tension, web tracking) before chasing sensitivity settings.
Clean sensor faces and verify position in a stable web area.
Use optical for standard labels; consider ultrasonic for clear film and laminate stacks.
Validate at real running speed to avoid “works slow, fails fast” surprises.
Standardized setup + simple operator instruction reduces downtime and improves output.
If you share your labeling station model and your label roll details (material, gap size, speed), I can tailor a tighter, model-ready adjustment checklist and a one-page operator SOP.